The entire process will consist of the following steps:
- Creating your Google Analytics account, service and data stream (version 4);
- Copying the Google Analytics tracking ID and pasting it into your fundraiser (in a dedicated field in the edit fundraiser);
- Creating a Measurement Protocol platform API key for tracking transactions/payments in the Google Analytics account you have set up and pasting this on your fundraiser as well (again in the specially prepared field in the fundraiser edit);
- Setting up a Google Ads account;
- Linking your Google Ads account with your Google Analytics account;
- Setting up conversions (e-commerce transactions) in Google Ads as an import of conversions (e-commerce transactions) from Google Analytics.
How can you do this?
1. first of all (once you have created the fundraiser) you need to set up Google Analytics (version 4). It's very simple and you'll do it at this link (if you don't have a Google account - you'll need to create one first - you'll do it all by going to the page at the link before the bracket):

After the initial creation of your Google Analytics account (during account creation you accept the terms of service and indicate your preferences for settings - the whole process takes about 2-3 minutes and is described below) you will configure the settings for your fundraiser tracking. First, create a Google Analytics account:
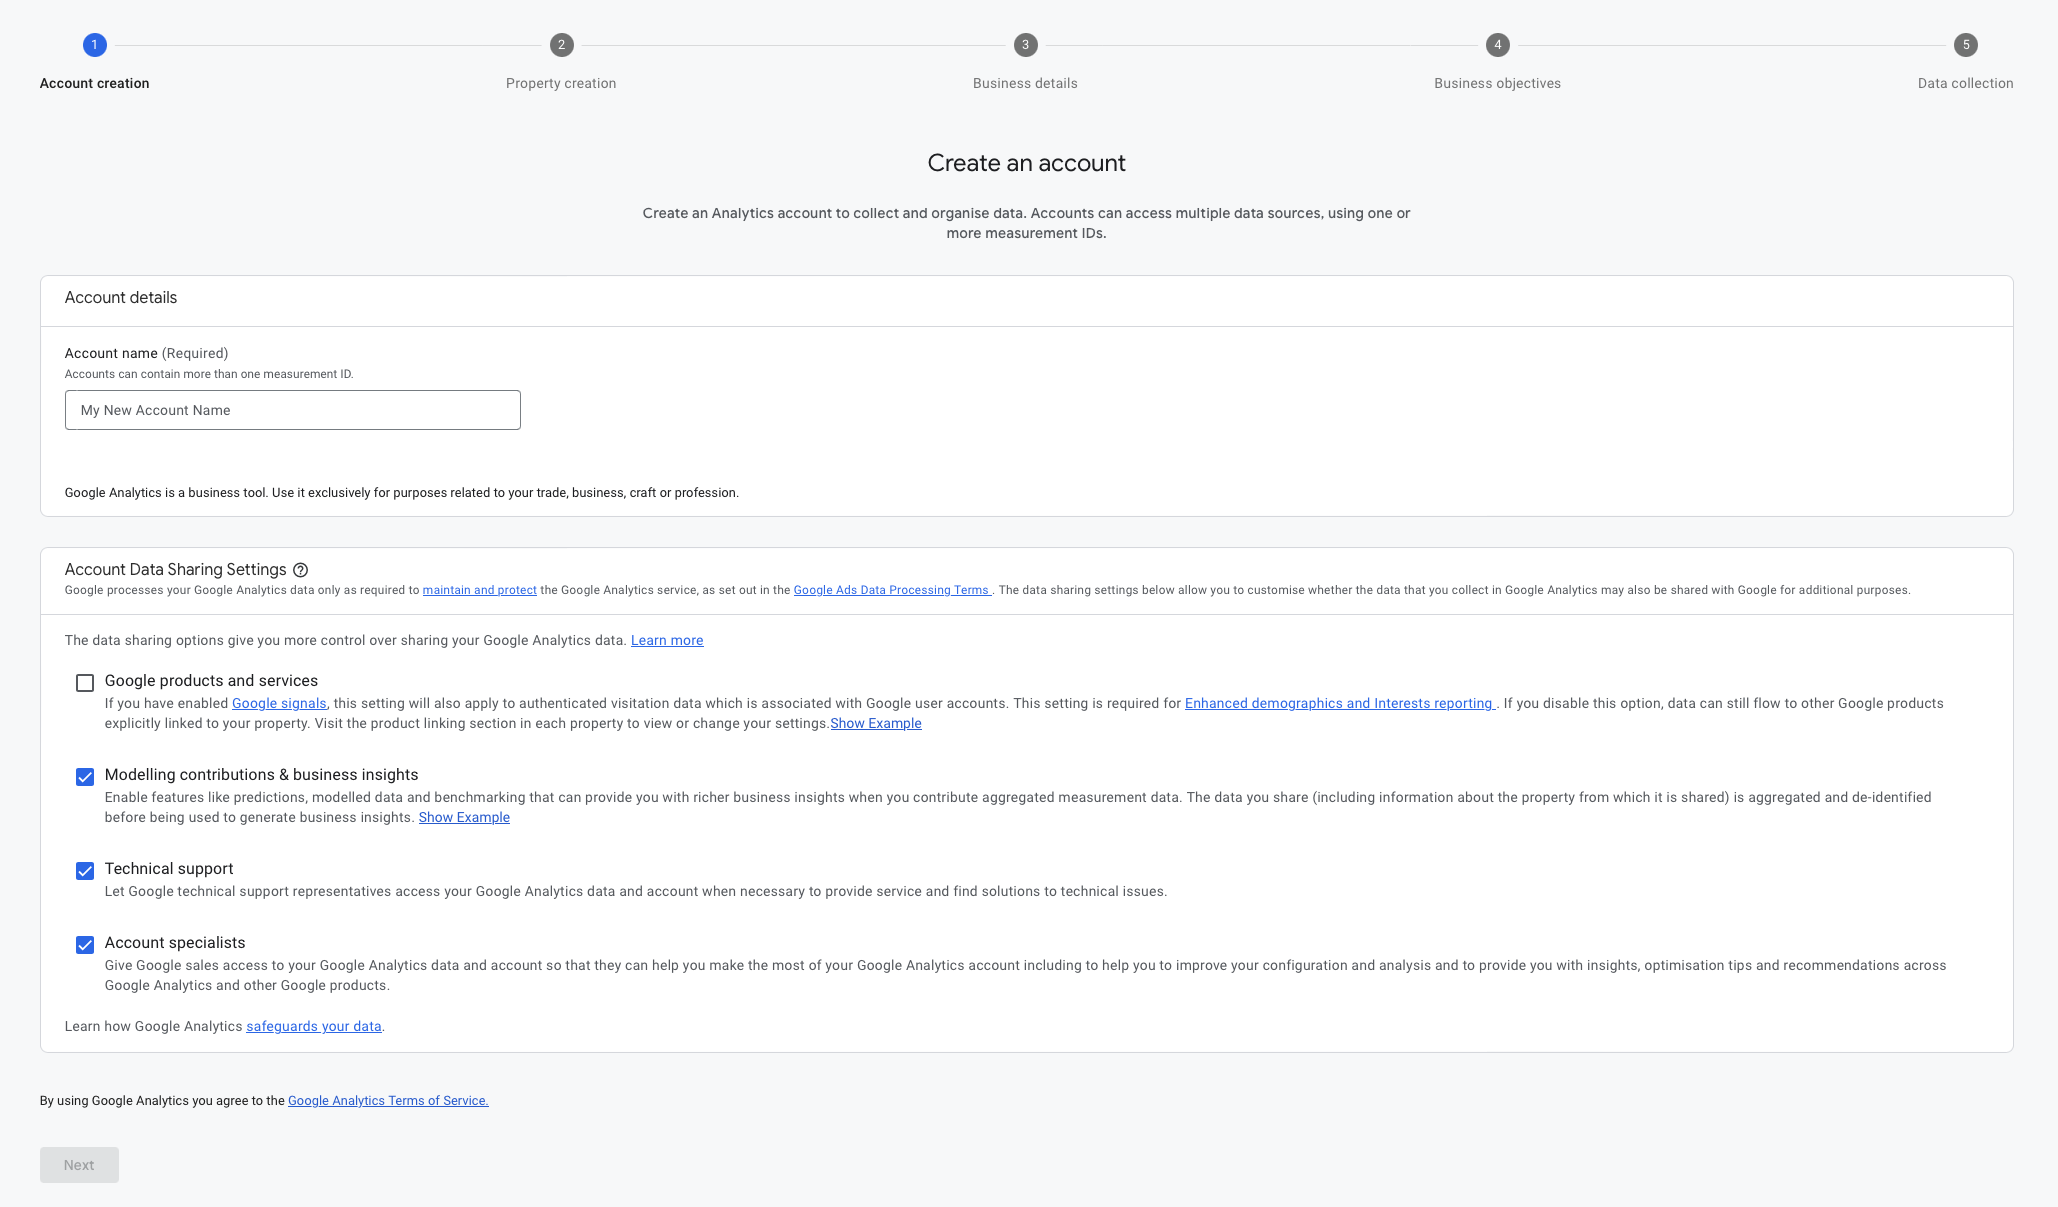
Important! Check the "Google Products and Services" option on this screen, under "Account data sharing settings". This will later allow your results to be shared with the Google Ads system:

Go to the next step and provide a name for your Google Analytics service and select the appropriate time zone and currency for the service. This setting will allow you to accurately report information about the results of your fundraiser: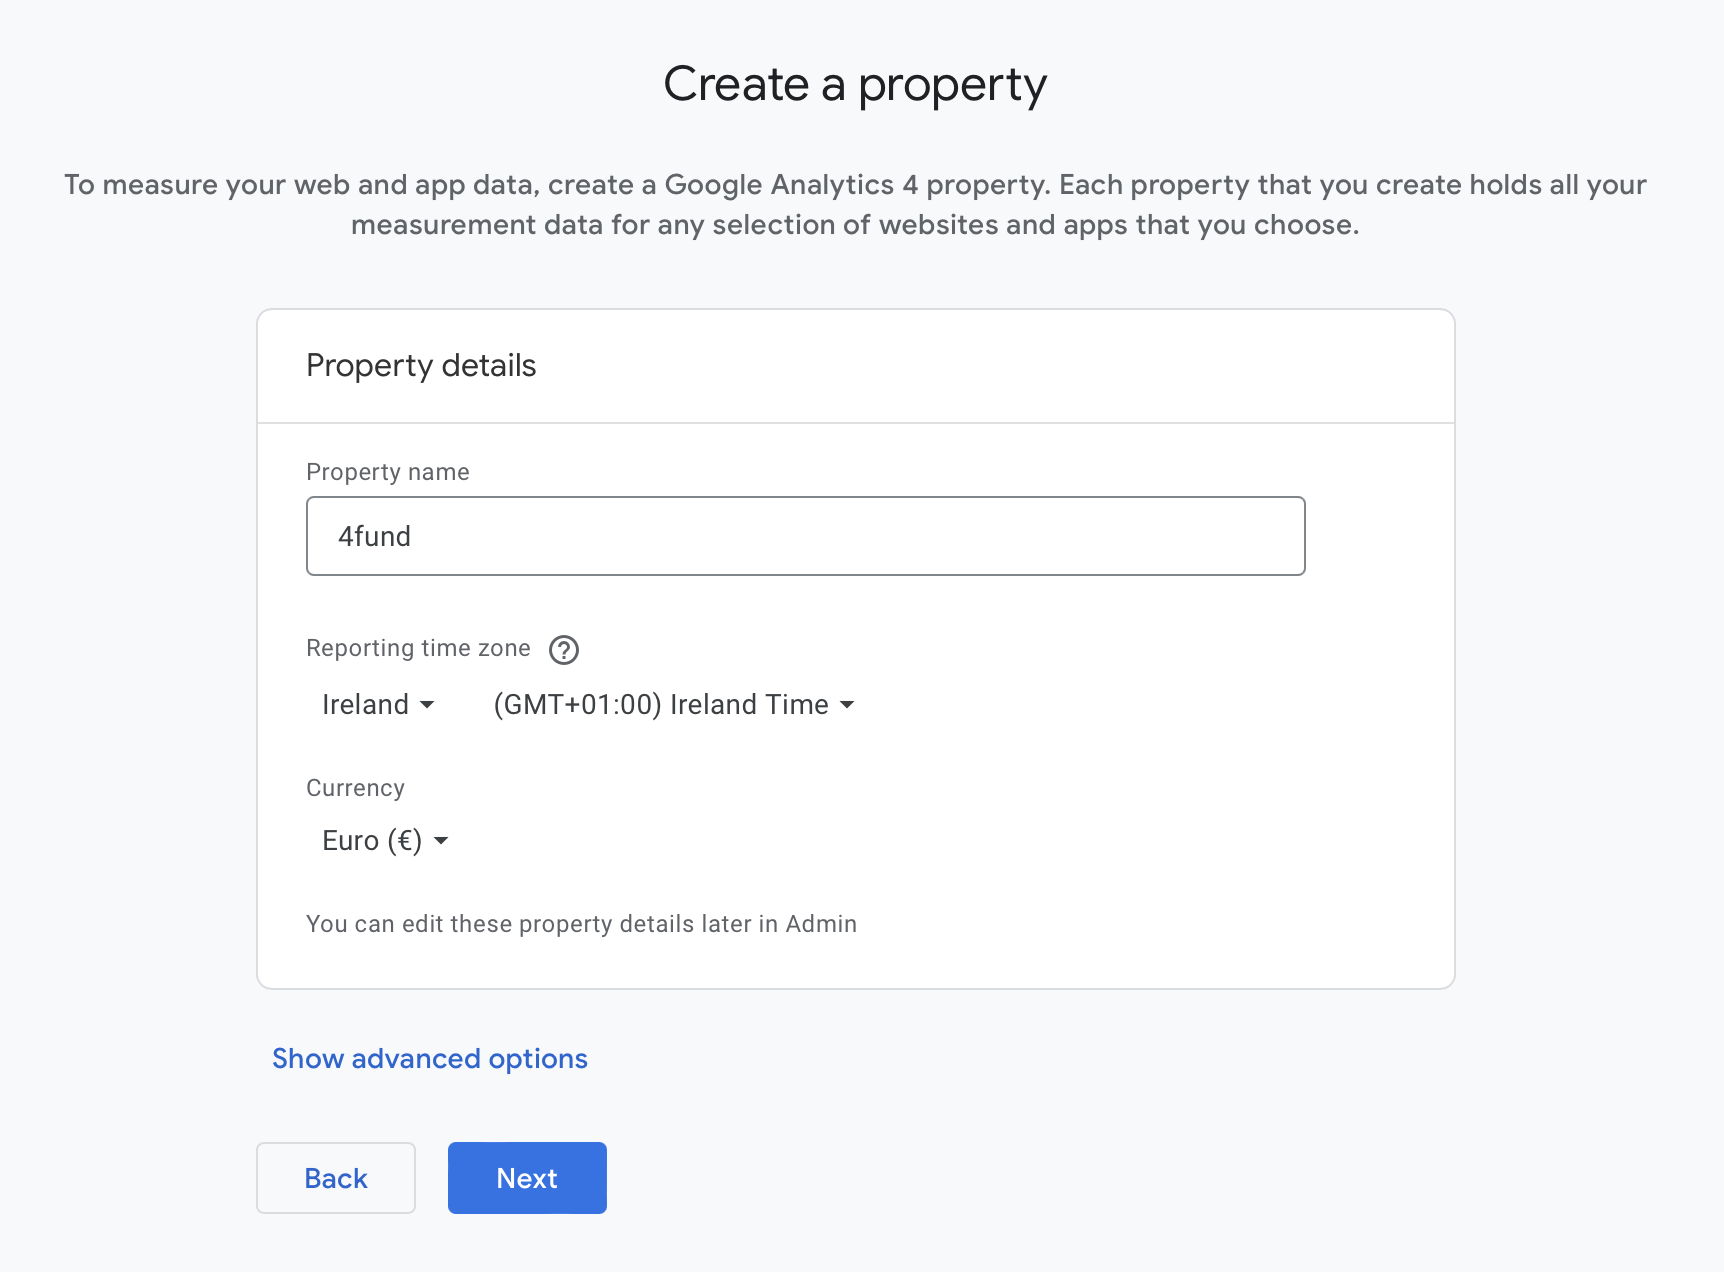
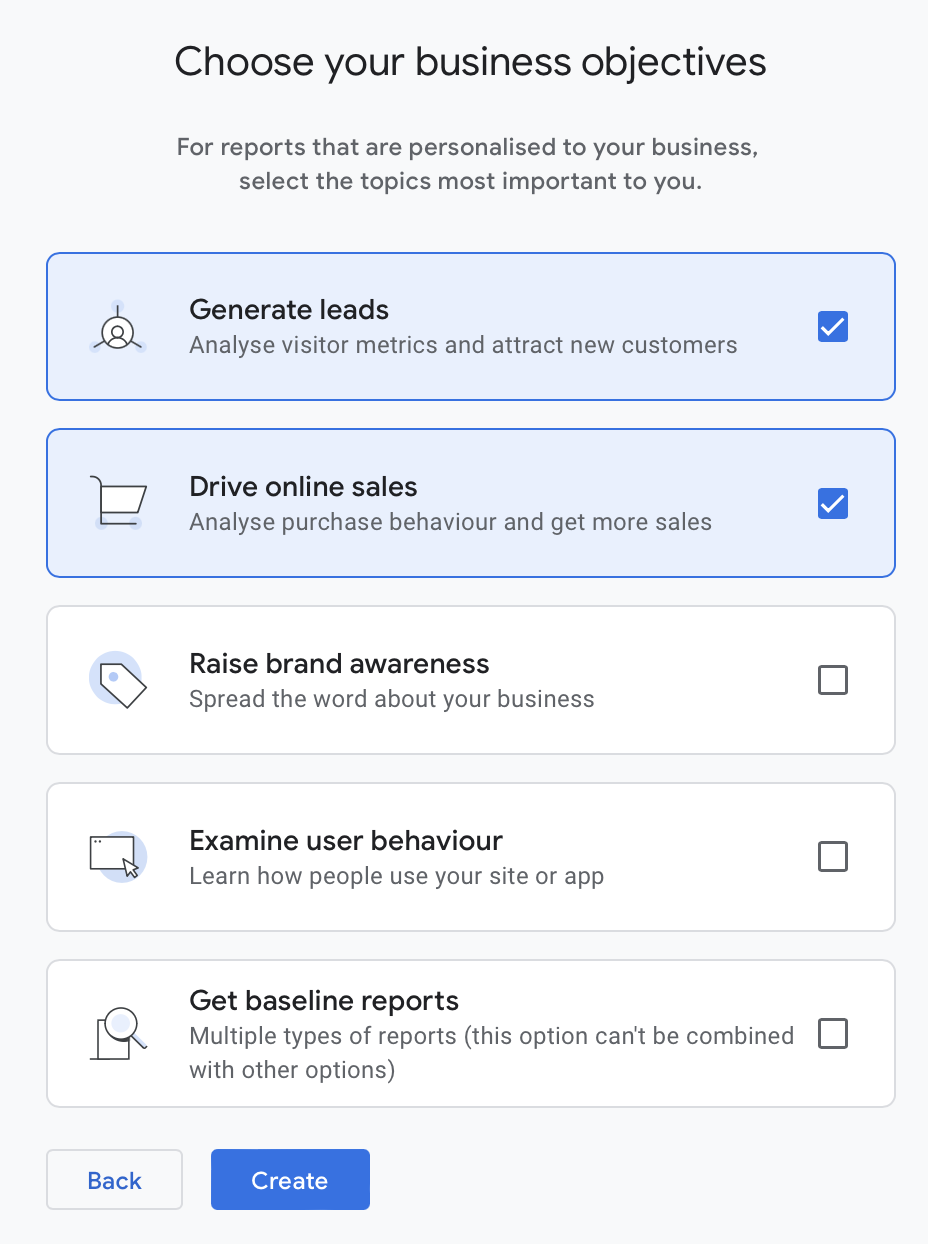
In the next step, you provide additional information. In yet another, you define your business goals - this step will be used to pre-prepare report templates in Google Analytics. We recommend ticking the options "Generate leads" and "Drive online sales".
The last step is to accept the terms and conditions for using Google Analytics. Once you have done this, your Google Analytics account and service will be created and prepared, and you will be invited to configure your website (or in this case, your fundraiser) to send data to the tool.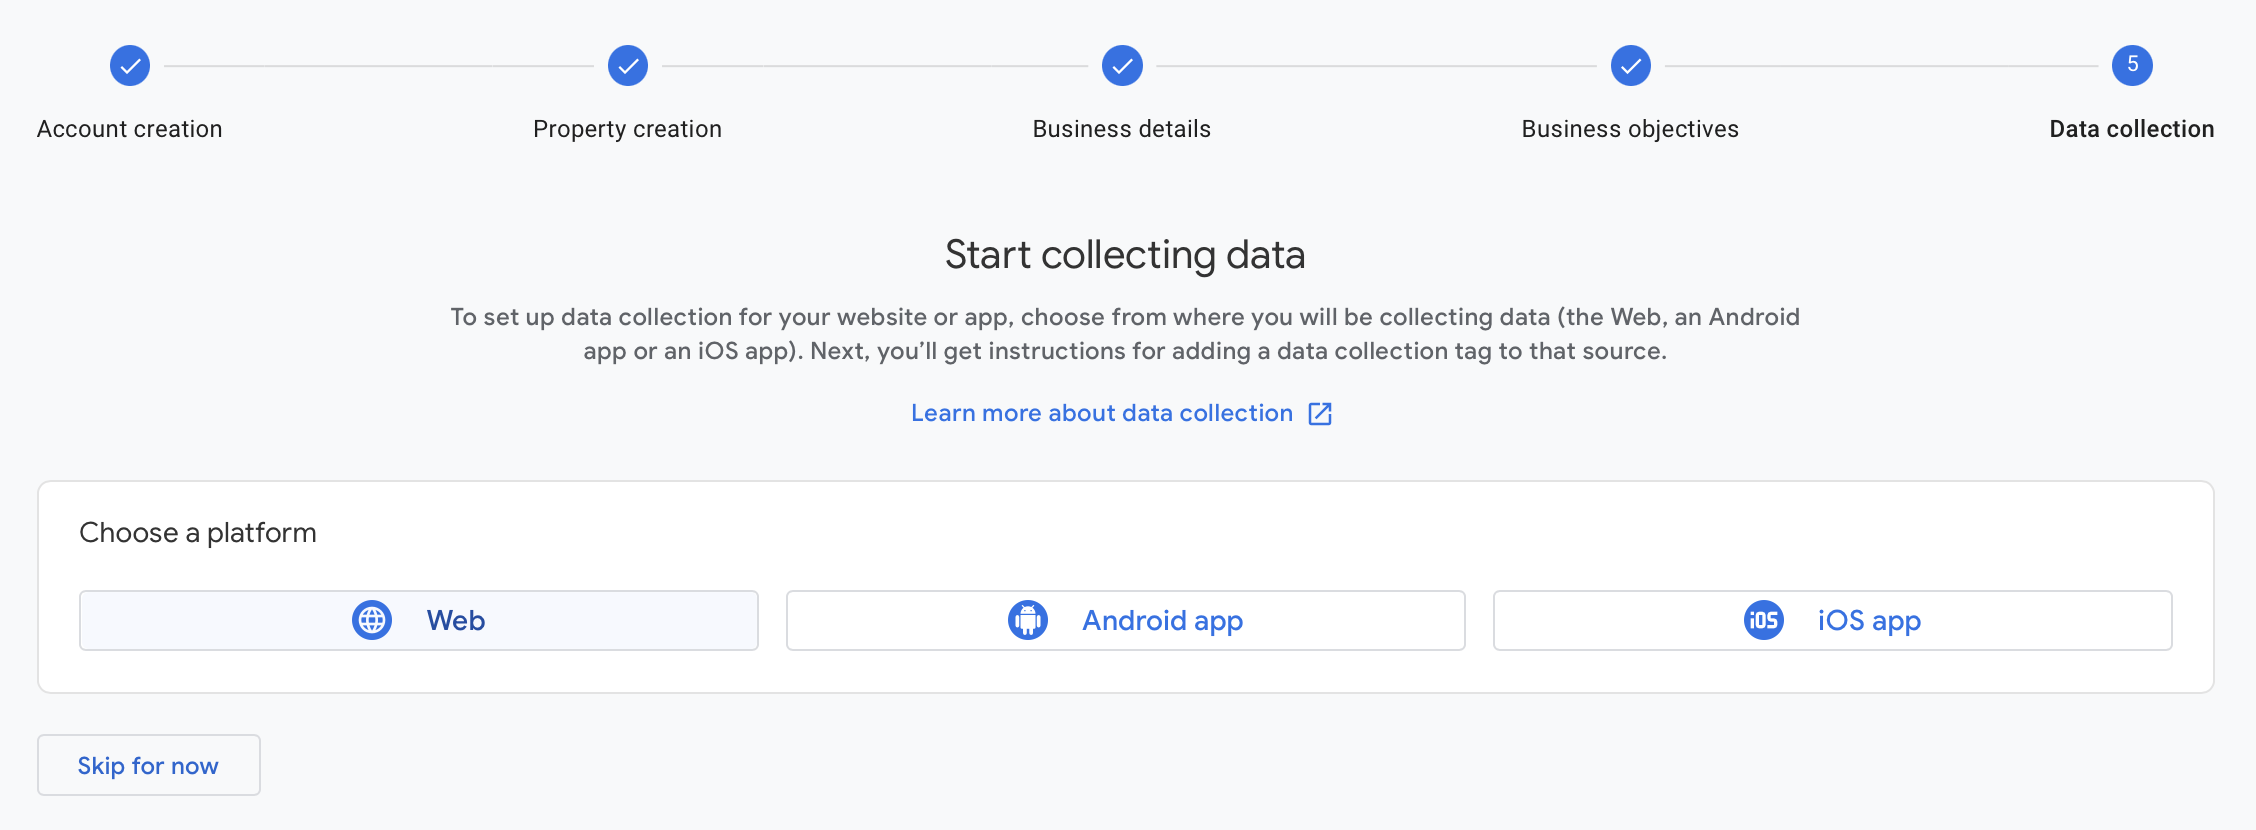
Select 'Web' as the platform. You will be asked to enter the address of your site and to enter the name of your stream. You can enter the address of your fundraiser here.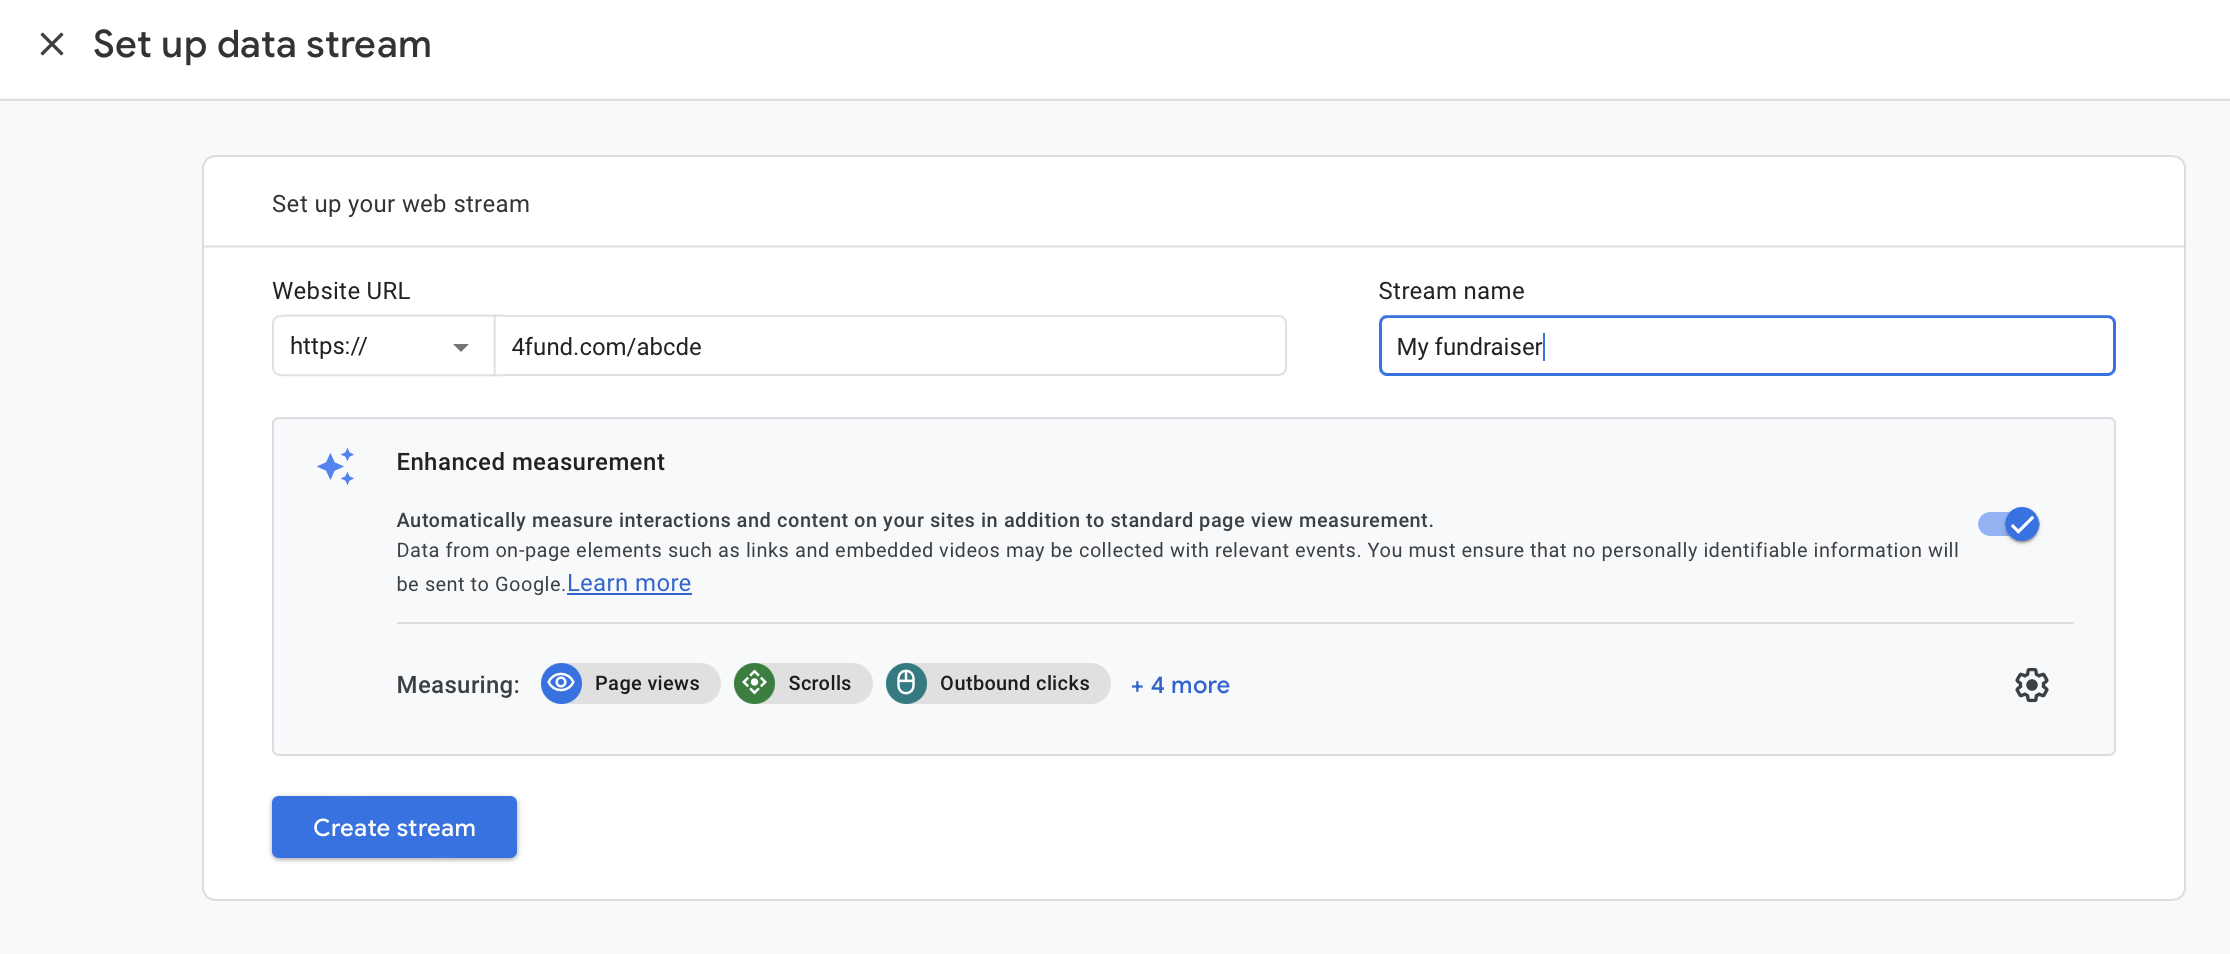
2. Once you have created your Google Analytics account, service and stream, you will see the measurement ID (on the screen below it is in a red box and starts with 'G-') assigned to your Google Analytics data stream.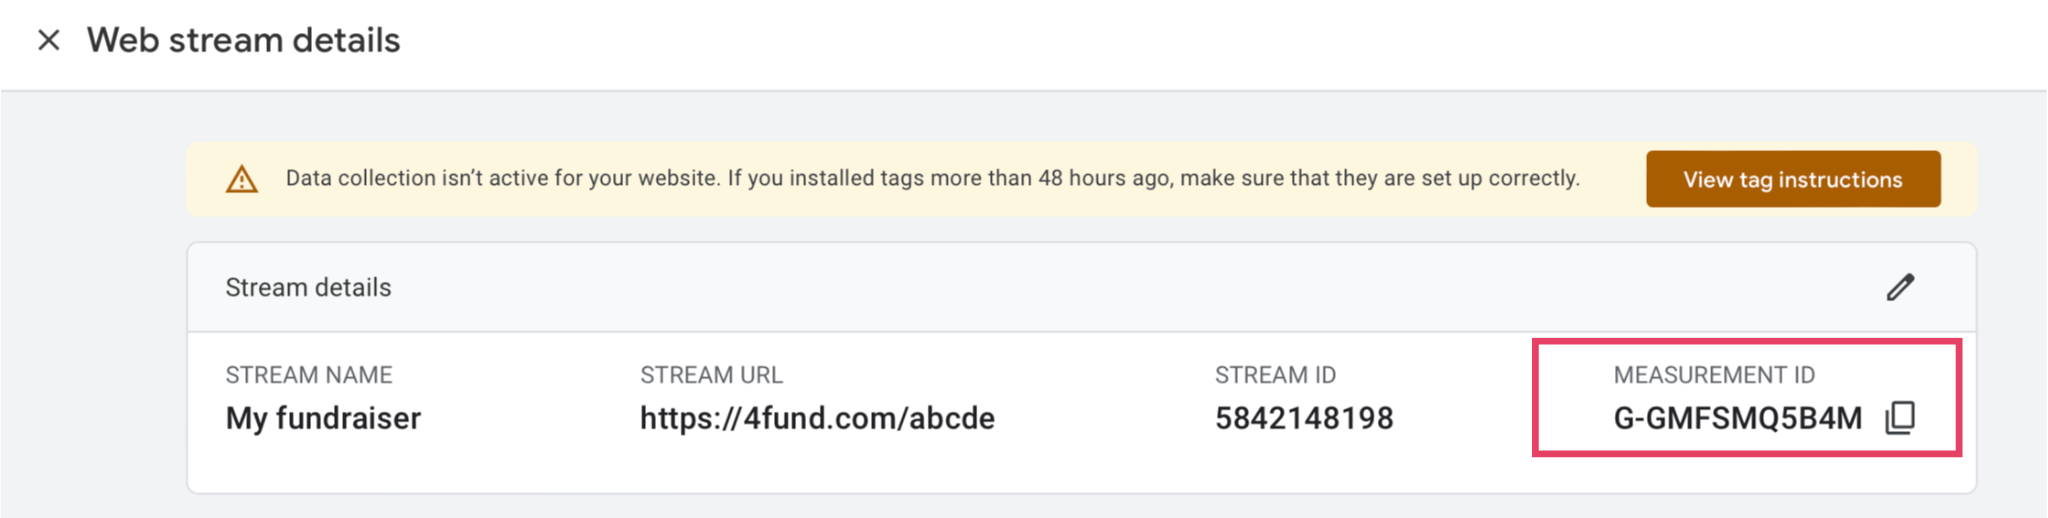
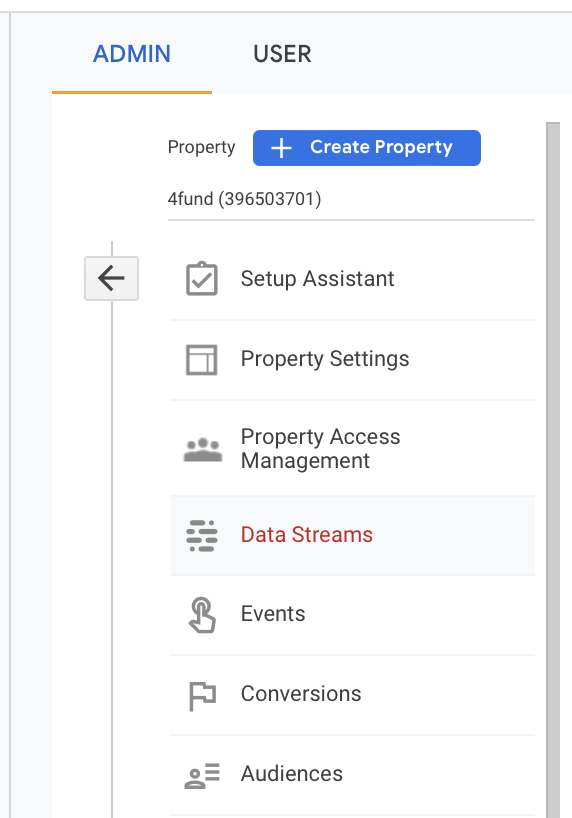
In case you accidentally closed it, remember that you will also find it by clicking on the cogwheel icon (with the caption "Administration") in the bottom left corner on the Google Analytics page and then selecting the "Data streams" option from the middle column:
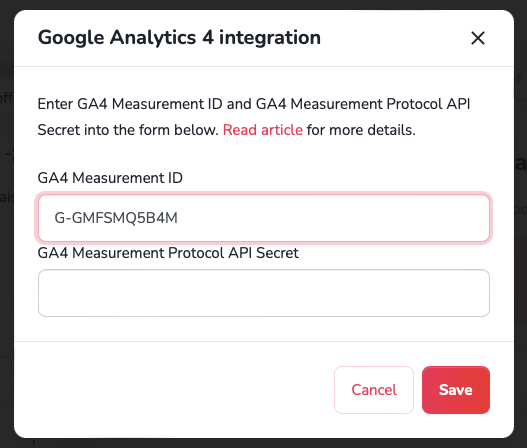
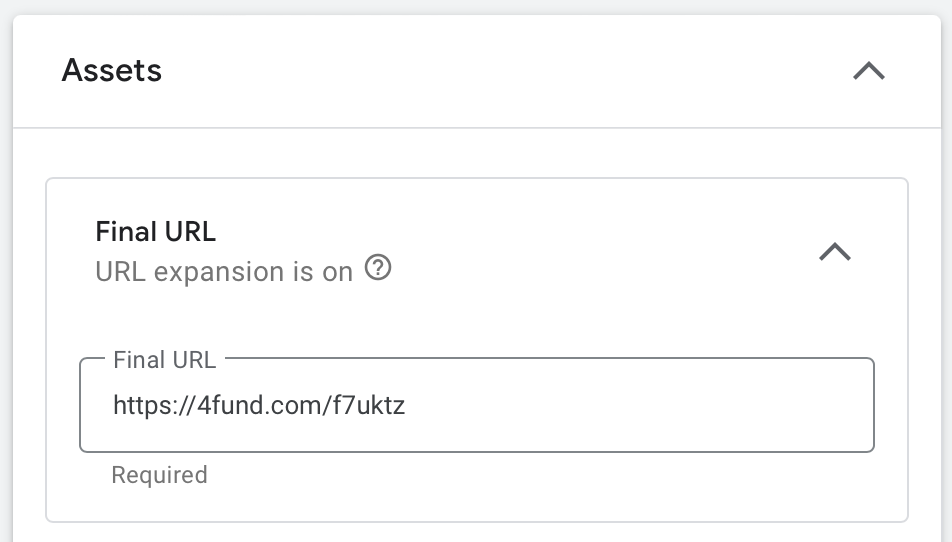
Copy the contents of the Google Analytics measurement ID (starts with "G-") and paste in the edit view of your fundraiser - by going to "integrations" -> "Google Analytics" and entering the measurement ID copied in the earlier step in the correct field:
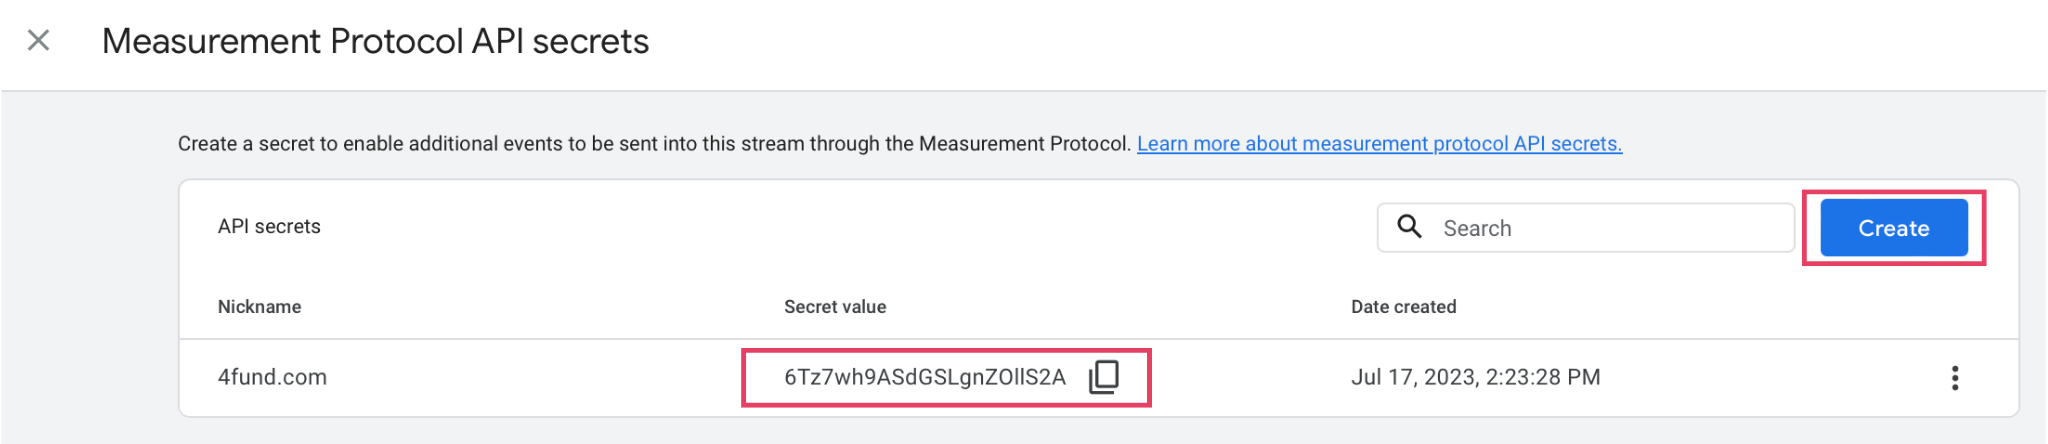
3. Again, going back to Google Analytics and the data stream settings - go to the 'Measurement Protocol platform secret API keys' option (located slightly below the measurement ID) and create a new API key: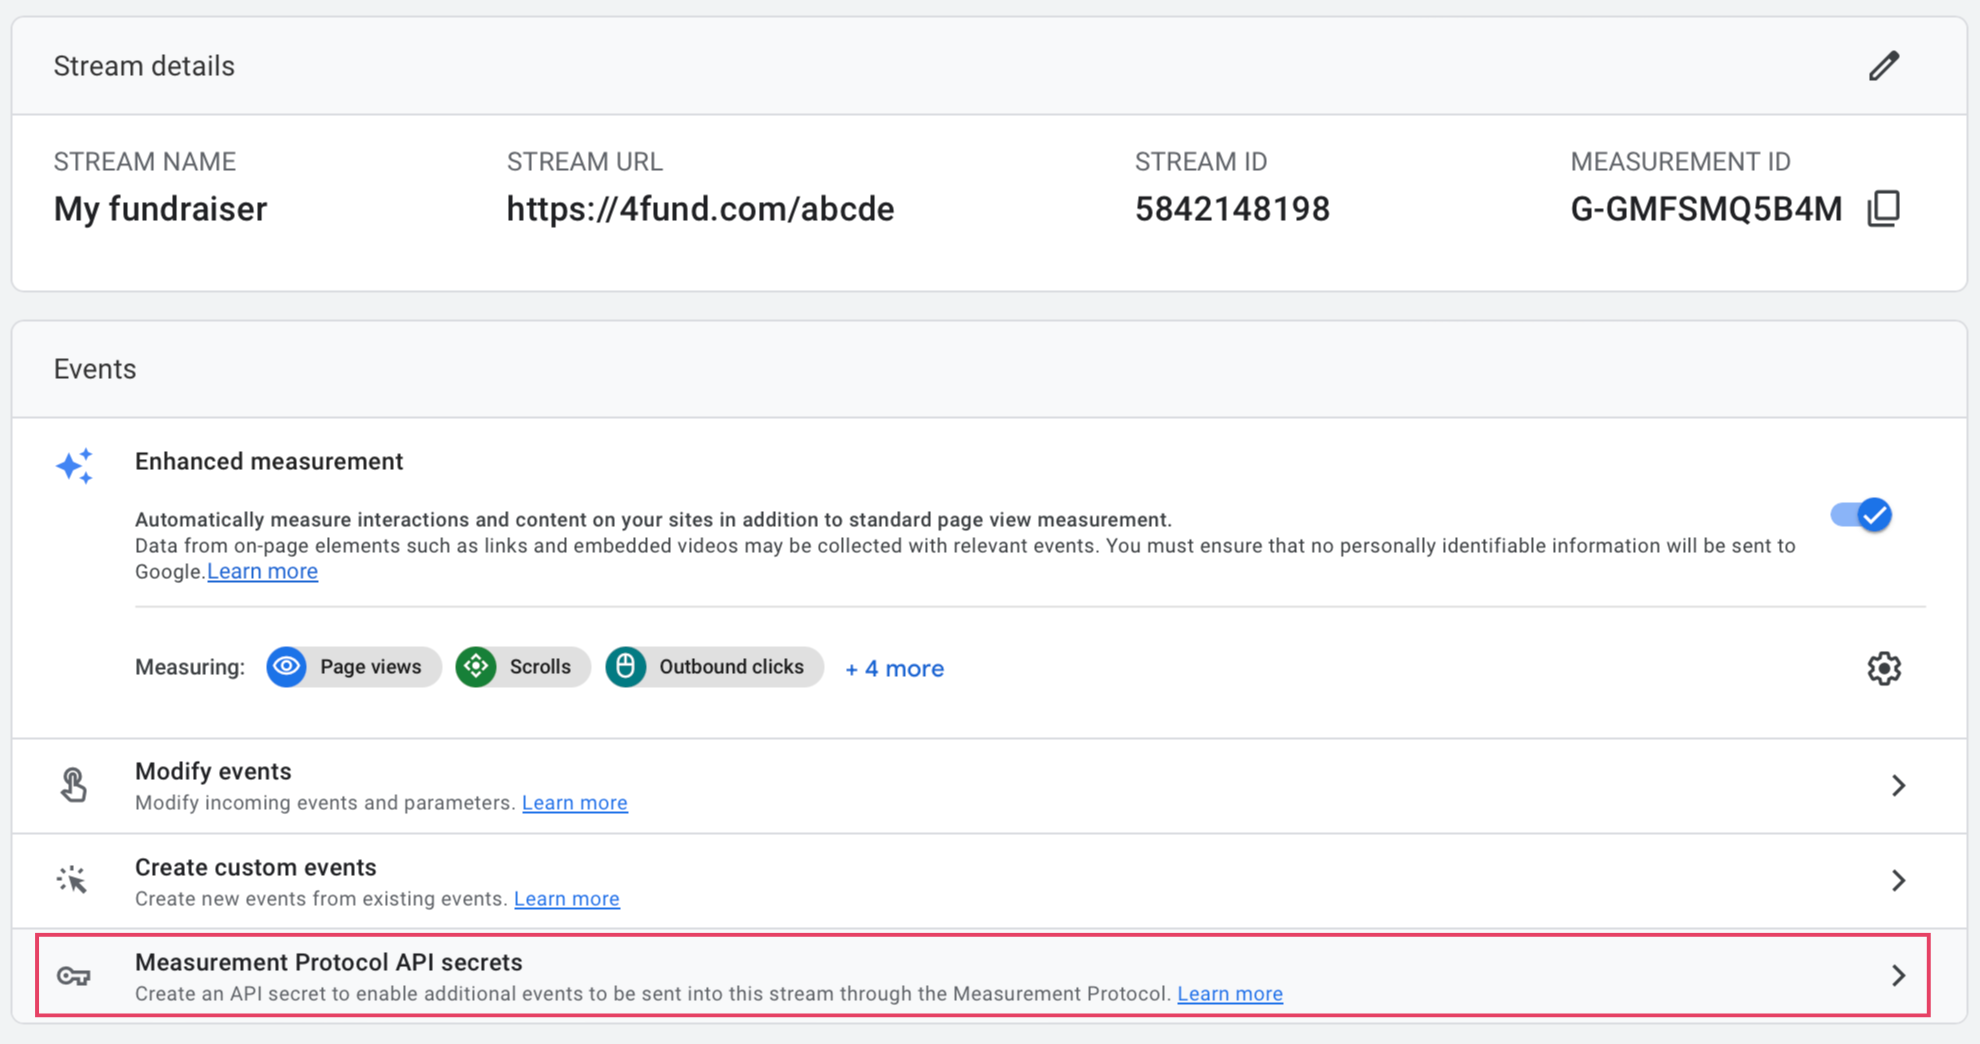
You can give it any name you like and, once created, copy its contents:
And paste in the second fundraiser editing option:

4. Create a Google Ads account - you will do this at this link by selecting "Get started now" and logging into your Google Ads account with your Google account (so you only need to have a Google account - important - use the one you used to log into your Google Analytics account in the previous steps - this will make it straightforward to link your Google Ads account with your Google Analytics account in the following steps). Next, when creating your Google Ads account, identify the target as follows:
Continue with the name of your company and include your fundraiser address as the website.
Then create your first test ad (this is a required step), enter your company details, billing card, etc. Once you have completed this process, switch the view to the so-called 'expert mode' (you set this in the top right corner of your Google Ads account).
After switching the view, go into Campaigns and if you wish - disable/delete the test campaign created during account creation by selecting 'edit' (you will set up the actual ad campaigns later).
Your Google Ads account is enabled - congratulations!
5. Link your Google Ads account to your Google Ananlytics account - to link accounts, go to 'tools and settings' and then - 'setup' and 'linked accounts':

Expand "Google Analytics (GA4) & Firebase", select your Google Analytics account and click connect. In the same place, it is also a good idea to activate the "automatic tagging" option.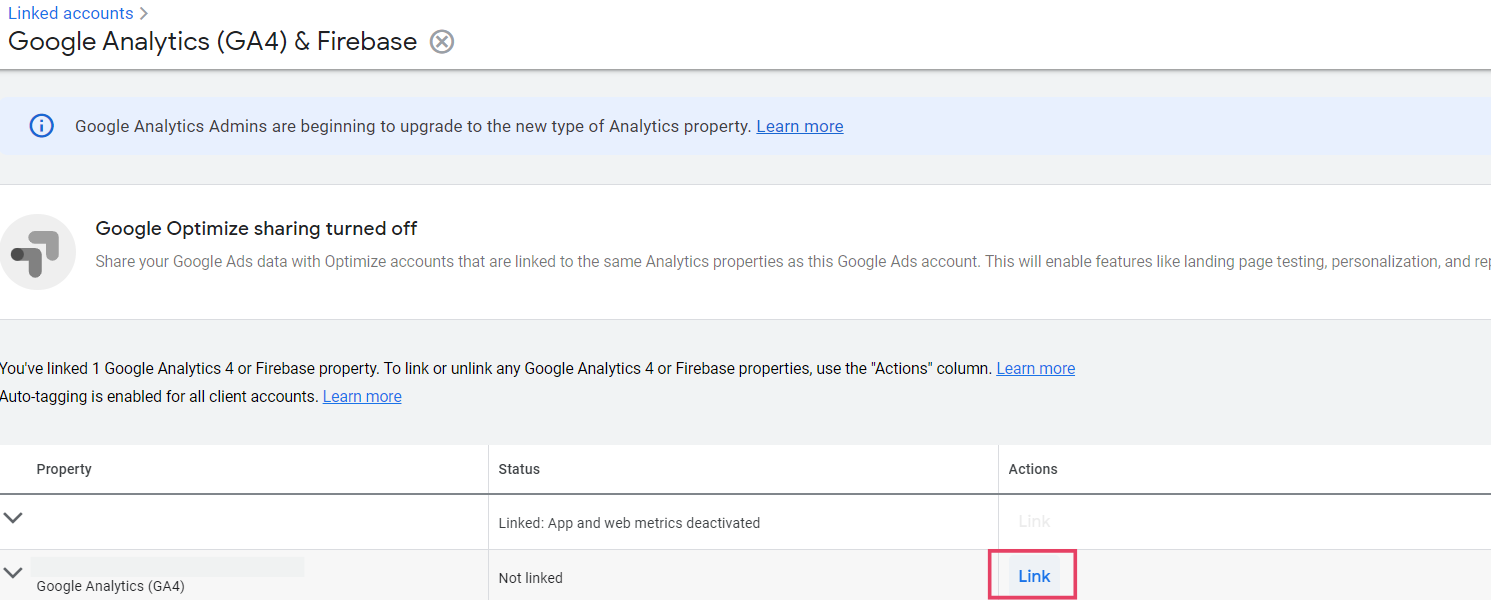
When merging, select the following option:

Done! Your Google Ads account and your Google Analytics account are now connected.
6. There is one last step left - setting up conversions (e-commerce transactions) in Google Ads as an import of conversions (e-commerce transactions) from Google Analytics. To do this, go into 'tools and settings -> measurement -> conversions' in your Google Ads account:

In the next view, select "New conversion event" and then "import" and select the "Services in Google Analytics 4" option and the "Internet" sub-option:
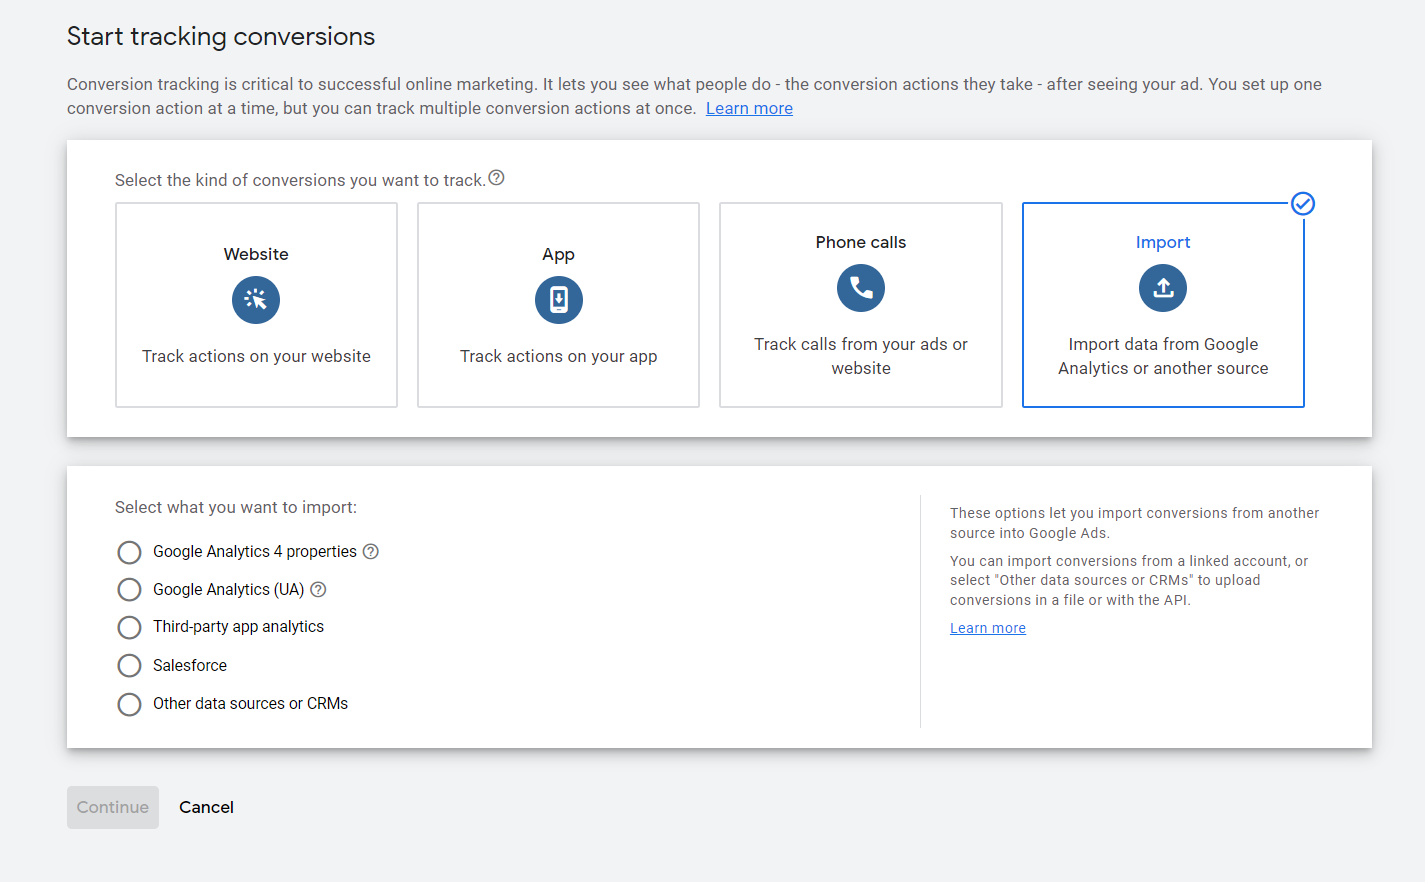
Click "continue" and that's it! Congratulations! Your accounts are linked and conversions (e-commerce transactions) are shared between them. If someone donates or enters your fundraiser, you will see their actions in the "Real time" report in your Google Analytics account.
You can now move on to setting up your Google Ads and optimising them for getting donations to your fundraiser - you will do this by selecting the conversion indicated above when creating any campaign.
Remember - you can also, based on Google Analytics data, create audience groups - e.g. visitors to your fundraiser. You can later target such people with ads (e.g. reminder ads). You can configure audience groups by going to tools -> shared resources -> managing the audience of your Google Ads account.
Also learn about conversion tracking and Facebook ad configuration - read our dedicated blog post.
You will find additional useful links below:
a. Setting up a Google Analytics account: read.
b. Configuring e-commerce in Google Analytics: read.
c. Combining Google Ads with Google Analytics: read .
d. Importing Google Analytics conversions into Google Ads: read.
e. Creating ads and campaigns in Google Ads: read.
f. Setting up automatic tagging in Google Analytics (from within Google Ads): read.
g. Google Analytics custom campaign tagging (utm-y): read.
You may also be interested in: Facebook advertising - how do I set it up to make my fundraiser a success?, Advanced features of 4fund.com - how to use them?.
Thinking about setting up your fundraiser? Get to know us better and find out why it's worth a try!
First of all - how does it work?
It's simple - go to 4fund.com, enter how much money you want to raise, what are you going to spend them on and you're done! After a short verification, you will be able to use all the features of the portal without limitations. You can withdraw funds from your fundraiser whenever you want as often as you need, and thanks to the express withdrawal option, you will receive the funds in your account within minutes of ordering it! What's important - 4fund.com is maintained mainly by donations - you can use the portal 100% free of charge. We do not charge any mandatory fees from fundraisers or supporters.
Secondly - does it work?
After 10 years of development, we are coming to you as the leaders of the Polish crowdfunding market. Poles have fundraised over one billion PLN on zrzutka.pl (the Polish name for 4fund.com)! Our biggest actions include the #TogetherForUkraine fundraiser, which raised almost €700,000, or the fundraiser for the Crisis Helpline, which raised more than €380,000 in just two days.
However, 4fund.com is above all tens of thousands of private fundraisers - birthdays, trips, settle joint initiatives and others.
Collect one-off or in a subscription model and realise your goals with 4fund.com!