Wondering how to advertise a fundraiser? This article takes you step-by-step through setting up a full, effective Facebook advertisement for your fundraiser (along with measuring conversions, that is, donations) and shows the scale of involved possibilities! It's not difficult at all, and the results can be stunning!
Creating a fundraiser with a good headline, description and photos is essential (find out how to do this here). This is the start of your fundraising efforts. But sometimes simply sharing a link with your friends is not enough. Learn how to promote a fundraiser on Facebook!
Go to section:
- How effective could Facebook advertising be?
- How do I set up a Facebook advertising account?
- Setting up an effective, results-measuring Facebook ad step by step
- Is there any way to verify the domain 4fund.com in my ad manager?
How effective could Facebook advertising be?
Here we possess information from our own experience. We have sometimes set up ads with a return of up to 20 times, meaning for every €20 spent, the ad generated €400 income for the fundraiser!
It should be mentioned that such effective advertising is mainly for charitable fundraisers, which the general public can decide to support (this does not mean that other fundraisers will not achieve good results in advertising). The most important factors are a good, attractive photo, engaging text and the correct configuration of the ad. We describe the most relevant configuration issues in simple steps below.
How do I set up a Facebook advertising account?
Creating an advertising account (i.e. an Ads Manager) is a straightforward operation, requiring only to set up a 'company' page (click here) on Facebook and have a payment card. Once you have set up your company page, you do not need to create an account in the Ads Manager because Facebook does it automatically. Just add your payment card and you are done! The whole process is described here.
Setting up an effective, results-measuring Facebook ad step by step
When your Ads Manager account is ready, you can move to configure your ad and the elements that measure the payback (this is known as measuring conversions, which are the contributions raised for your fundraiser by the ad).
Add a Facebook Pixel to your fundraiser
Facebook Pixel is a special code that tracks conversions. If you already have a Pixel, open this link, copy your Pixel ID and proceed as described in step 6.

If you don't have a Facebook Pixel yet, then you can create one as described in steps 1 - 5 below:
1. Go to the Events Manager (in your Ads Manager)
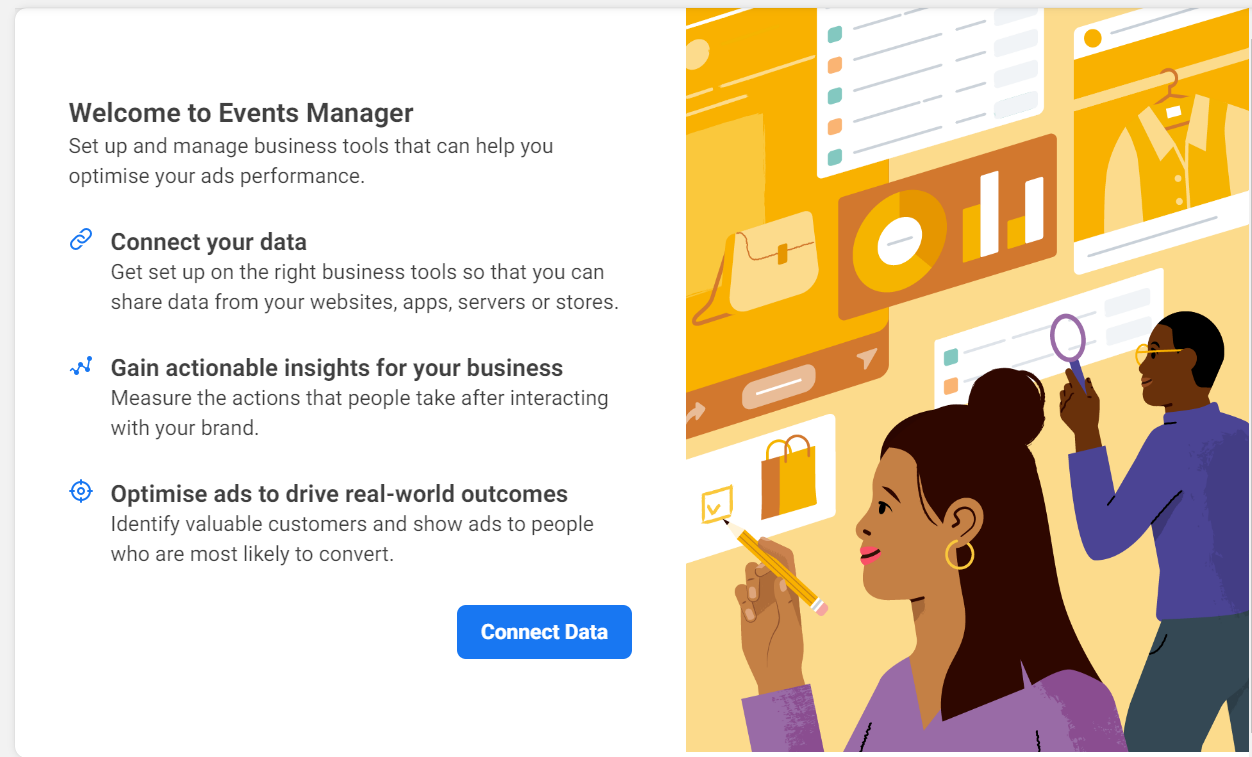
2. Click " Connect data":
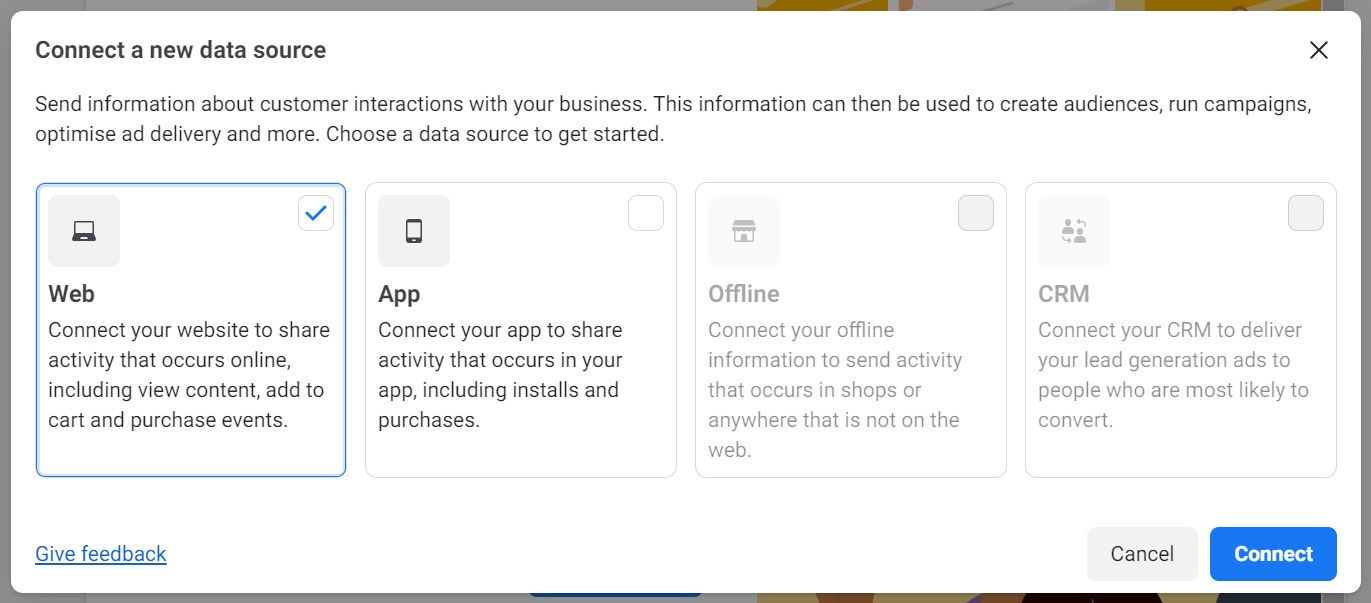
Then select the " Web" option
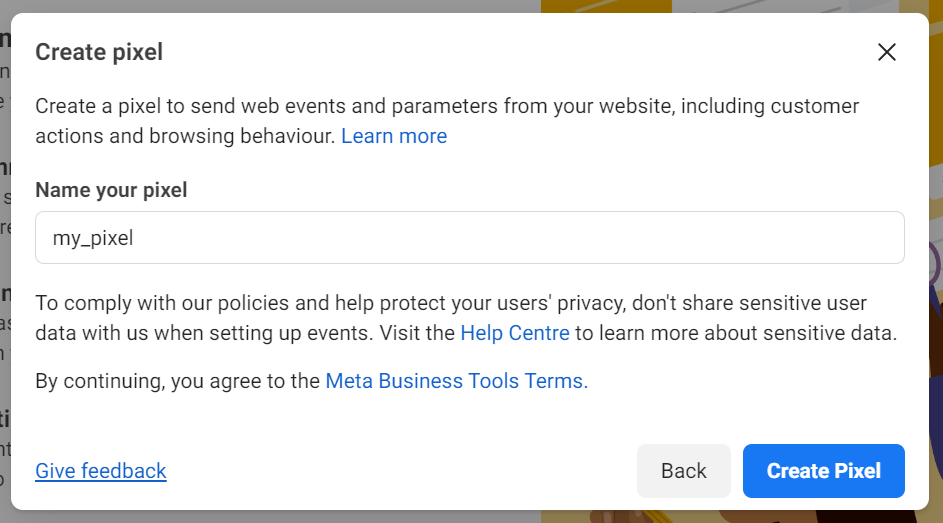
3. Add the name of the Pixel.
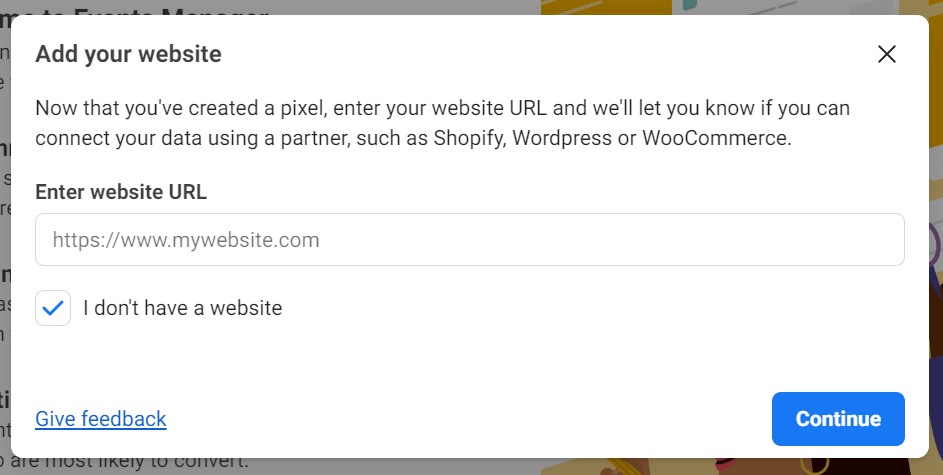
4. In the next step, skip the website URL
5. Select " Meta Pixel only". You will see the ID number of your Pixel below. Copy it.
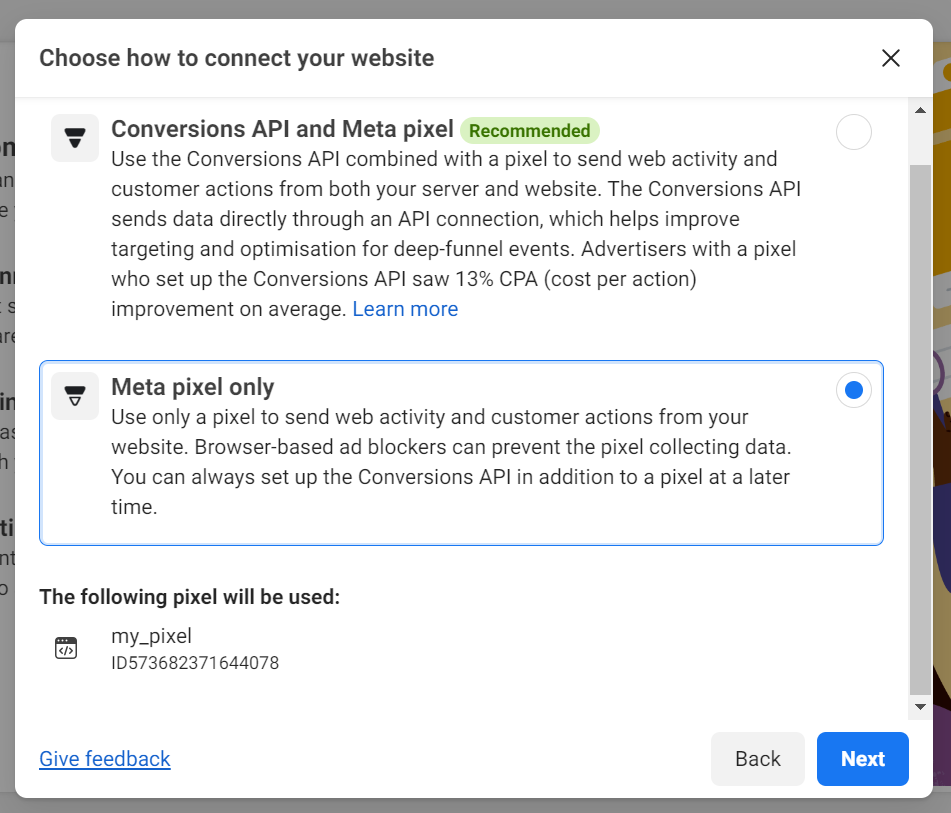
6. Next, go to the view of your fundraiser, scroll to the very bottom by going to the "Integrations" tab and click on the "Facebook Pixel" to paste in the ID you copied earlier:
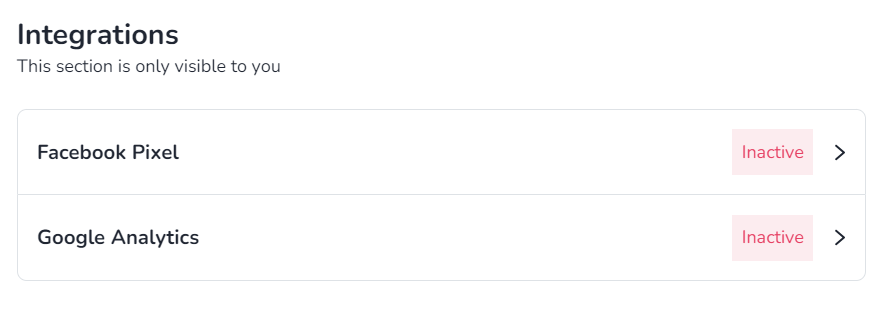
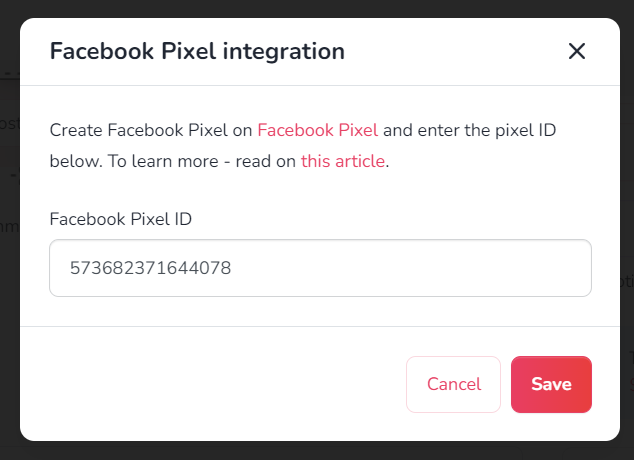
Done! You installed Pixel on your fundraiser. Next, you need to check the conversions that your ads will be targeting - the purpose of the ads will be to get just those "conversions", or in this case, donations to your fundraiser.
Check the conversion rate
Firstly, make sure that steps 1 - 6 indicated in the section "add a Facebook Pixel to your fundraiser" have been done correctly and then follow the guidelines below.
Once you add a Pixel to your fundraiser, we automatically return a so-called standard purchase event (Purchase). In practice, if you have a Facebook Pixel added to your fundraiser (according to points 1 - 6 above) and someone has donated, you will see the standard event "Purchase" for such a contribution in the Events Manager.
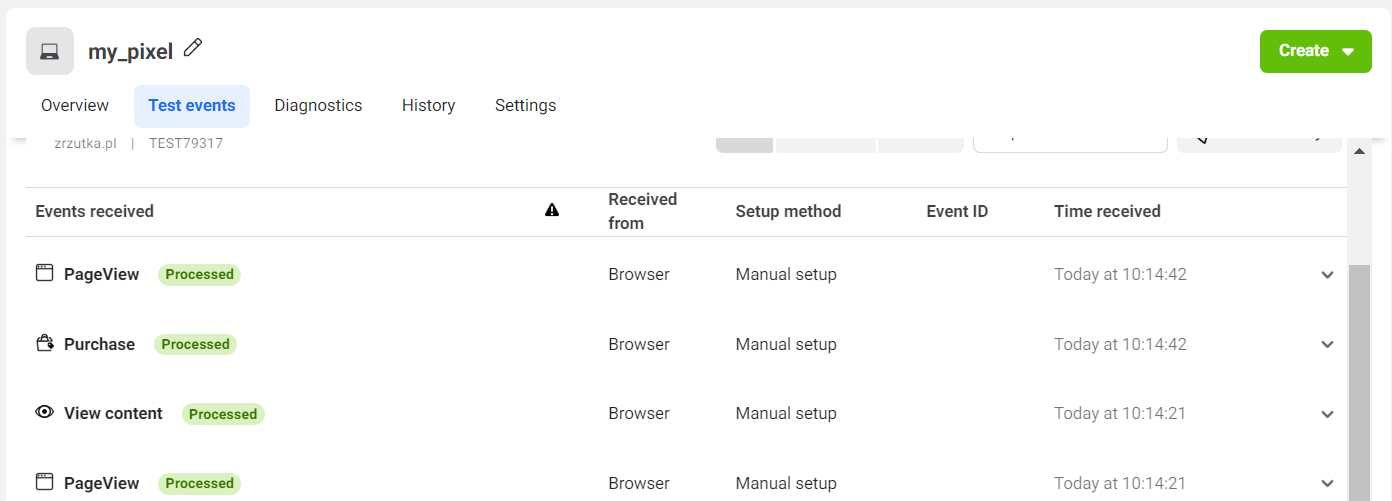
Note - PageView, the display of your fundraiser's page, is also automatically returned to your Pixel and you can use it to create ads whose purpose is to display the fundraiser, not a donation
What is very important for this event is that the system automatically returns the value of each transaction (i.e. donation) to your Facebook advertising account. This means even without the tracking link (described later in this article), you can view the results of the return from your advertising campaign (of course, in this situation, you can still use the tracking link for a 'double check'). In the Ads Manager panel, you will check them in the "Conversion value - purchases" column.
By reviewing the results, you can assess whether the value of the collected contributions is high enough to justify the performance of your advertising campaigns. Remember - if you want to check the performance of your Pixel on an ongoing basis, the Facebook Pixel Helper tool can be useful - with this extension, you can quickly check that your Pixel is working correctly.
Set up your ad campaign
The final step is to set up your ad campaign (go here and click "Create"). The goal of the campaign is to get just the conversions (fundraiser contributions) you set up in the previous steps.
1. Select "Sales" as the campaign objective and click "Continue":
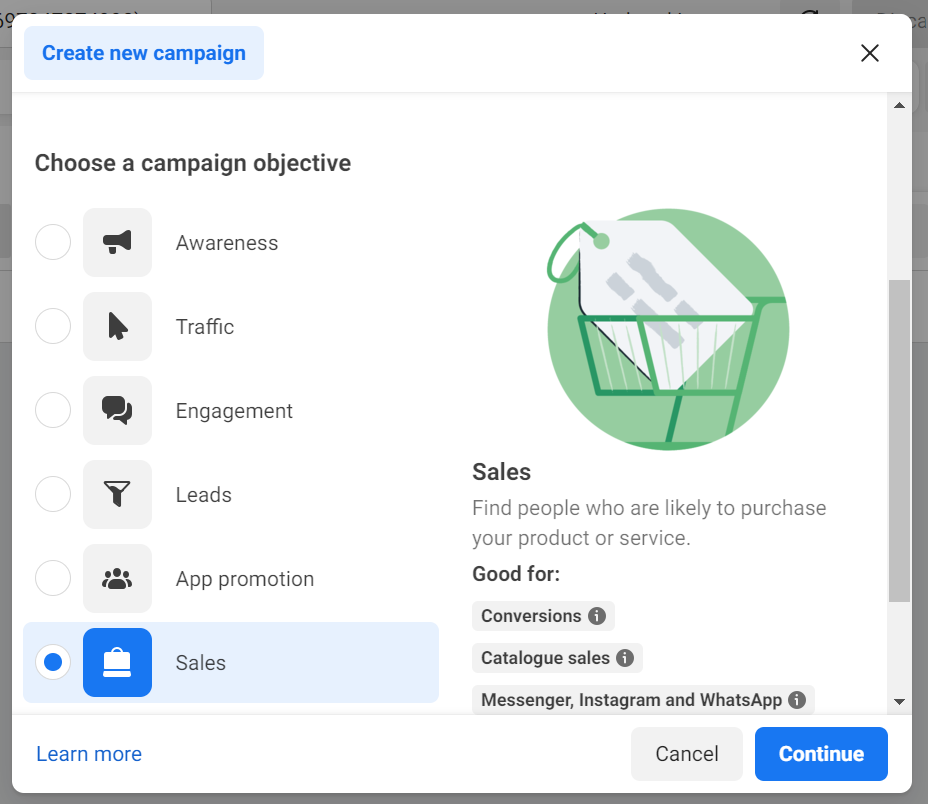
Then, when you go to create a set of adverts, you just select 'Purchase' as the Convertion event, which is the standard event that we automatically return for you:
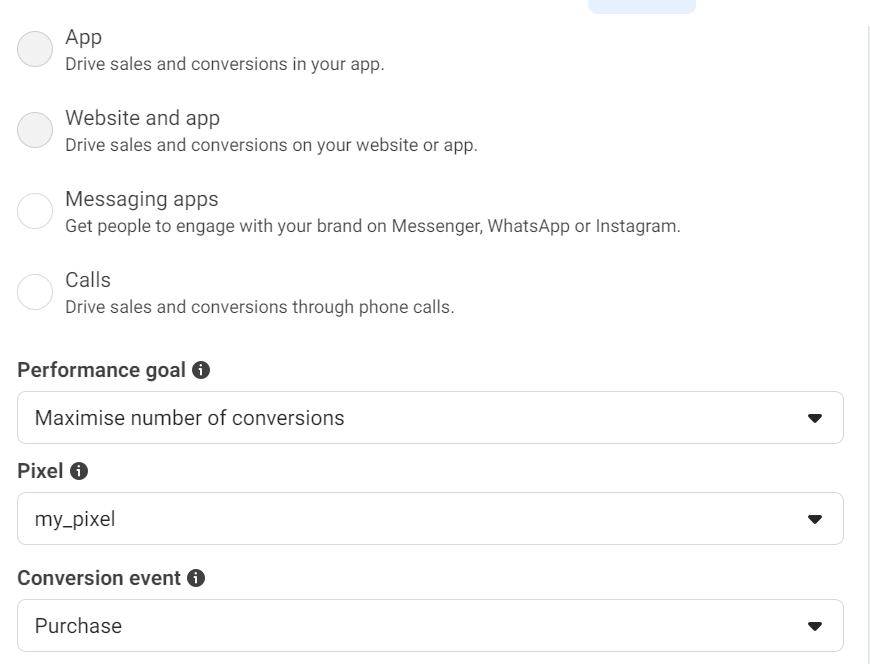
Setting up your campaign in this way will ensure that Facebook's advertising systems optimise targeting to generate as many fundraiser donations as possible within the agreed advertising budget.
2. The creation of the ad set and the ads themselves that follow is intuitive. You should configure your ad according to the indications you receive during setup. As a whole, we suggest the following settings:
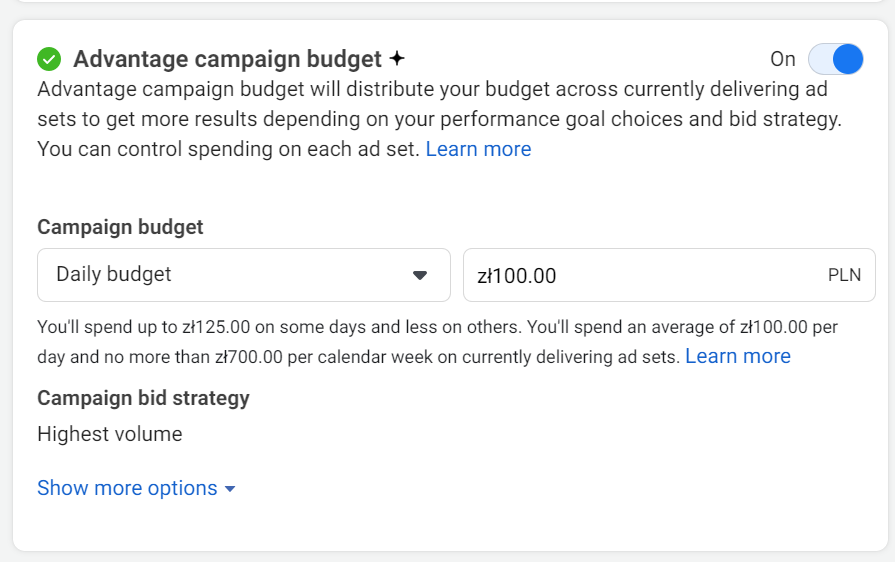
Campaign level (screen above) - here it is valid to include budget optimisation at the campaign level (so that the system will select the most effective ad sets for us from those created in the campaign) and to specify the daily/total budget.
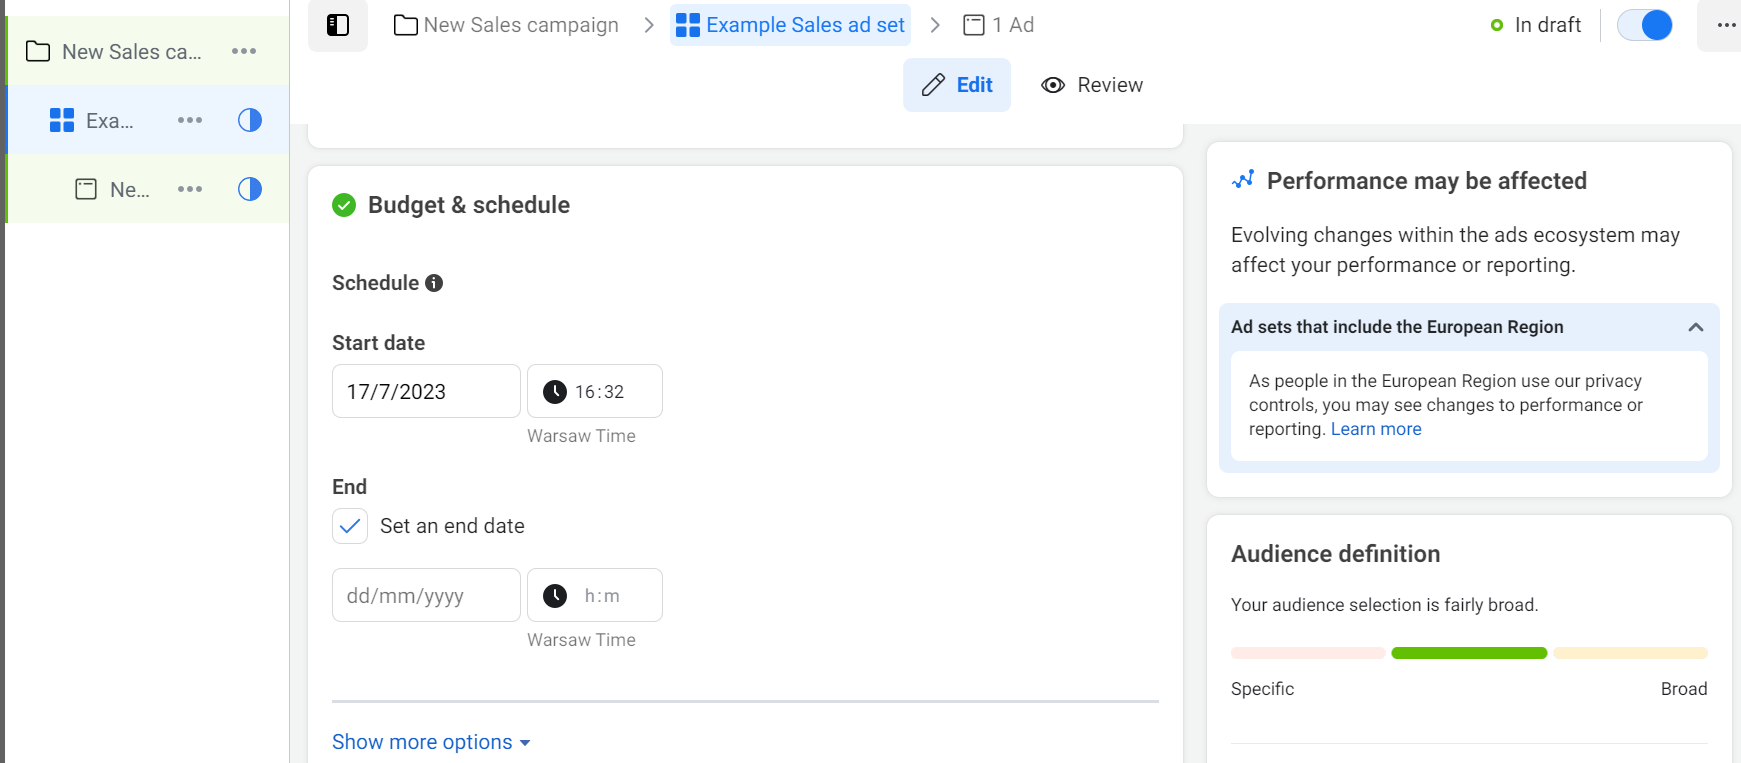
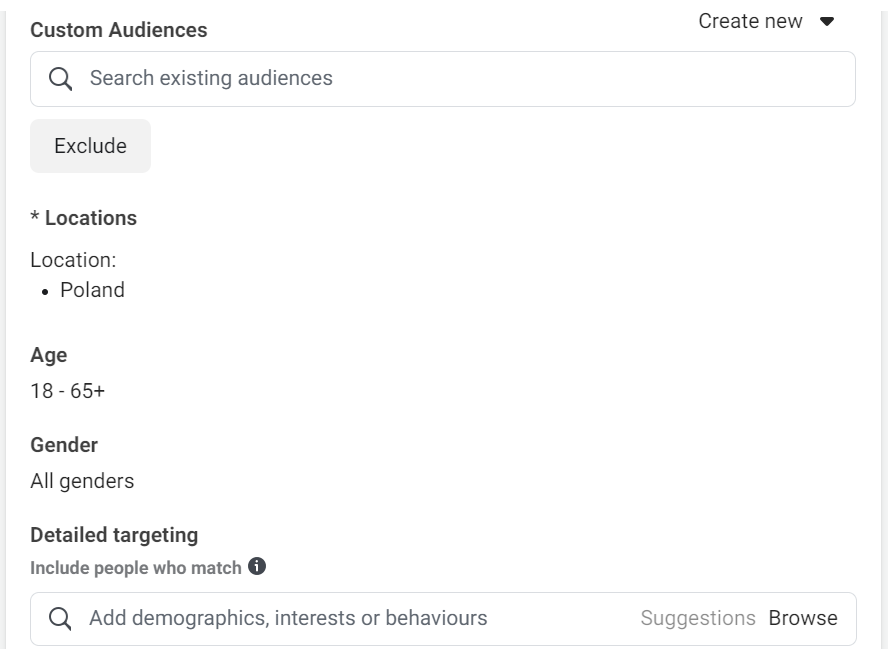
On Ad Set level (screens above) set a start and end date for the ad set, leave the whole country as the audience - Facebook will choose an audience willing to donate to your fundraiser. Leave automatic placements. Click "next" to see the view below:
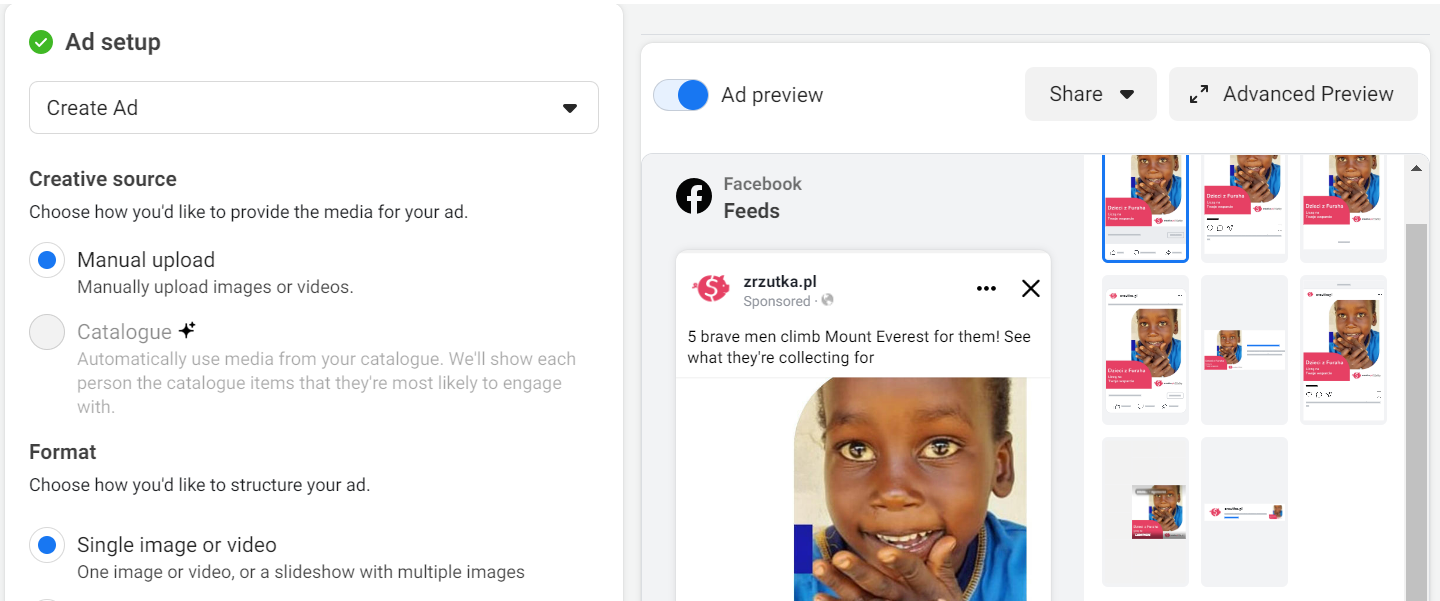
Mark your company's website as the identity (in our case it is zrzutka.pl, yours will be different of course). Choose any format you like (at the start it can be the straightest i.e. 'single image or video'). Add images and texts - it is significant to add good quality images, optimally cropped to 1080x1080 px and catchy texts. It is also crucial to add a landing page to which the ad will redirect the Facebook Users. To set it up, scroll down to the "Destination":
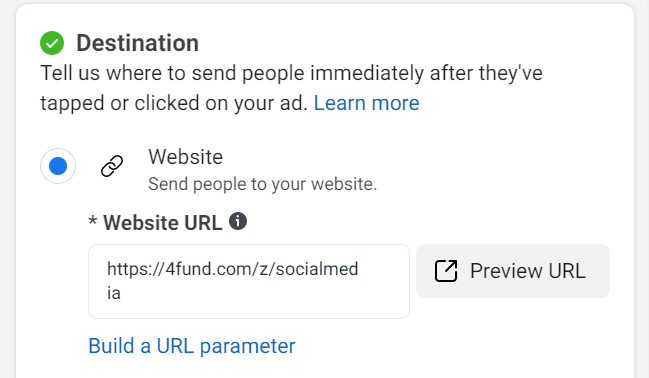
Here, it is worthwhile to create a so-called tracking link for your fundraiser. By linking it as a landing page for your ad, you will make sure of the exact value of the donations raised through your ad. Insert the link and click 'publish' to finish the configuration.
In summary - with the "Purchase" conversion, added according to the guidelines in the first part of this article, it will be possible to automatically optimise the campaigns you have created for the goal you are interested in - i.e. getting donations for your fundraiser. By using a so-called "tracking link" as the landing page for your ads, you will ascertain the exact return on your adverts and confirm that the "Purchase" conversion is working correctly. The method described in this article, based on a simple conversion and a tracking link, will work regardless of the purpose of your fundraiser - this way, you can optimise campaigns for charitable fundraisers as well as ads for sales fundraisers where supporters purchase goods or services.
Read the article on integrating with Google Analytics and Google Ads marketing tools. Setting up Facebook advertising yourself seems complicated? No worries - we can do it for you!
EDIT - due to the iOS 14 updates, we are noticing issues in using conversions coming from the 4fund.com domain in Facebook's external Ad Managers - if you are experiencing such difficulties, please set up your campaigns to traffic, for example, and monitor conversions in Google Analytics by tagging your Facebook campaigns with so-called UTMs - more on this - this should, somewhat tongue-in-cheek, help. You can also use tracking links to monitor results from given ads.
Is there any way to verify the domain 4fund.com in my ad manager?
Unfortunately, allowing third parties to verify the 4fund.com domain in their Ads Manager is not possible, as only one company (in this case, ours) can verify the domain. However, as a general rule (as we read here and here): "Domain verification determines which company's Manager account has permission to configure the 8 available conversion events for a given domain and prioritise them". Since we, as the owner of the 4fund.com domain, have set "Purchase" for it as one of the 8 available conversion events for that domain, there should be no problem with other companies using this event to optimise their ads by installing the Facebook Pixel in their 4fund.com fundraiser view following the instructions in points 1-6 above.


